Adjusting a front derailleur demands patience and precision. Follow these steps to get crisp shifts that deliver the power to climb, descend, and cruise.
In just 7 easy steps we will show you how to adjust your bikes front derailleur for smooth and precise gear changes.
If your chain is dragging, not shifting or popping off the chain ring completely, you've come to the right place. Our friends at Bicycle Maintenance Guide put together some tutorial videos and a step-by-step guide to show us how it's done. You can find tips for other mechanicals in our Spotlight on essential bike maintenance and the repair skills you need for bikepacking and cycle touring.
Tools Required
7 steps to adjusting a rear derailleur
Step 1
Start by loosening the bolt which clamps the front derailleur to the frame, so that the derailleur can be moved by hand.
Step 2
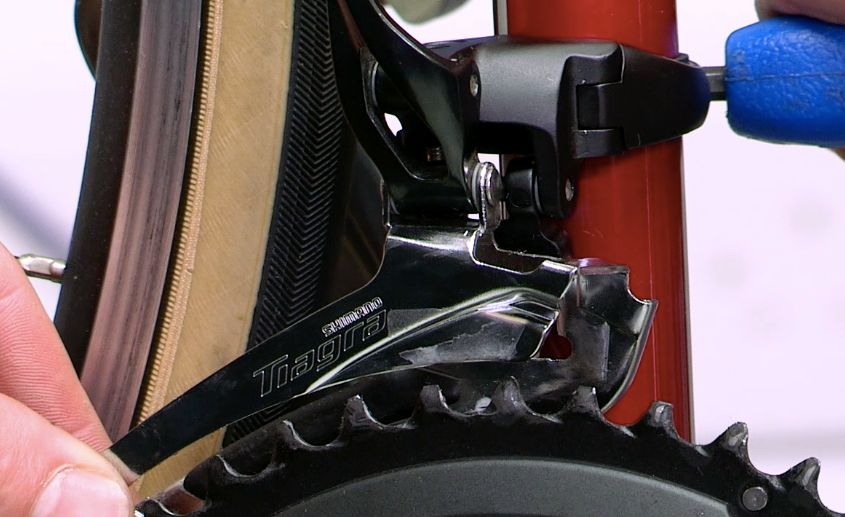
The first positioning adjustment needed when setting the derailleur up is that when the chain is on the small chain ring on a double chainset or on the middle chain ring on a triple, the outer plate of the derailleur should be 2mm to 3mm above the top of a tooth of the large chain ring. This can be checked by using a 3mm Allen key and placing it between the bottom of the outer plate and the top of a chain ring.
If any adjustment is needed to meet the clearance required, the derailleur should be able to be moved by hand as it is only loosely nipped on to the frame.

Step 3
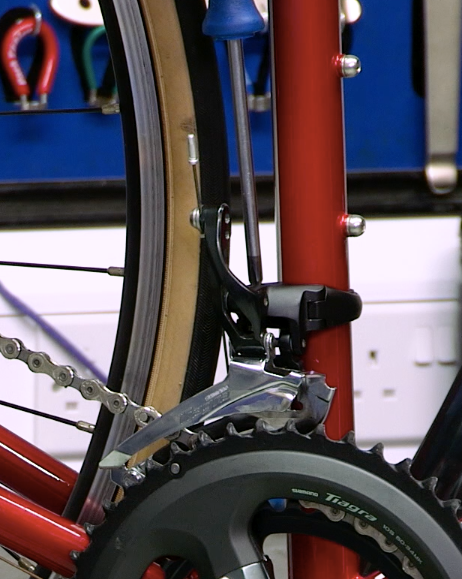
Once the height of the derailleur is set, the next positioning adjustment is to check that the outer plate of the derailleur is square to the chain ring.
If any adjustment is needed to make the derailleur square, make sure that the height of the derailleur has not been altered. The derailleur can then be tightened to the frame.
Step 4
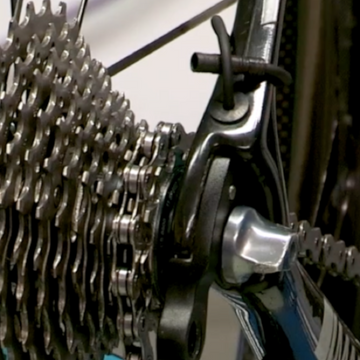
Now you need to check the limit positions. The low limit screw on the front derailleur adjusts the inside plate in relation to the smaller bottom chain ring. To set the lower limit position change the rear gears into the biggest sprocket on the cassette. In this position, there should be a gap of 1mm between the inside plate and the chain.
Step 5
To adjust the lower limit, adjust the L-screw in the clockwise direction to move the front derailleur away from the frame, and to move the front derailleur into the frame screw the L-screw anti-clockwise.

Step 6
To set the high limit position, change the rear gears to the smallest sprocket on the cassette and manually push the front derailleur over the big chain ring or pull the gear cable to force the derailleur across. Once again there should be a 1mm gap between the chain and the outer plater on the front derailleur. To adjust this high limit position, use the H-screw to move the outer plate to give the correct clearance between the outer plate and the chain.
By turning the H-screw clockwise the outer plate will move in towards the chain reducing the gap, and vice versa, screwing the H-screw anti-clockwise will move the outer plate of the derailleur away from the frame and give a bigger gap between the chain.
Step 7
The next step is to check the cable tension. If the cable tension is not correct, the front derailleur will not index up to the big chain ring correctly. When the cable tension is correct the front derailleur should index all the way up to the high limit position that was set on the previous step. To adjust the cable tension, use the barrel adjustor on the down tube of the frame. To increase cable tension, unscrew the barrel adjustor so that more thread can be seen on the adjustor, this will take up any slack in the cable.
Adjust the barrel adjustor in stages whilst trying to index the front derailleur after each adjustment to check if the front derailleur is indexing correctly.
Step 8
Finally run through all the gear combinations on the bike to check there is no rubbing and that the front derailleur is operating correctly.
Credits
This content is brought to you by us and our friends at Bicycle Maintenance Guide. They have an app which makes a complete bike maintenance course.
Apple app - https://apple.co/2PFkqMT
Android app - bit.ly/2wOwWCM
This repair has been carried out on a component from a popular brand. If you are using a different component please refer to the manufacturers manual to ensure specific details of the component/task are known. The principles and general skills of the task can be transferred but maybe not the exact details.
Sonder Bikes
Camino Al Apex1 AXS XPLR
- Sram Apex AXS XPLR 12-speed groupset
- Sonder Nova I25 Gravel UK Made wheelset
Camino Al Rival AXS XPLR
- SRAM Rival AXS XPLR 13-speed groupset
- Sonder Alpha I25 Gravel UK Made wheelset
Camino TI Force AXS XPLR
- SRAM Force XPLR 13-speed groupset
- Sonder Alpha I25 Gravel UK Made wheelset
Camino TI Rival AXS XPLR
- SRAM Rival AXS XPLR 13-speed groupset
- Sonder Alpha I25 Gravel UK Made wheelset
Camino Al Apex1 Flat Bar
- SRAM Apex 12-speed groupset
- Sonder Nova I25 Gravel UK Made wheelset
Camino Al 105
- Shimano 105 R7120 12-speed groupset
- Sonder Nova I25 Gravel UK Made wheelset
Camino Al GRX1
- Shimano GRX 610 12-speed groupset
- Sonder Nova I25 Gravel UK Made wheelset
Camino Al GRX2
- Shimano GRX 610 12-speed groupset
- Sonder Nova I25 Gravel UK Made wheelset
Camino Al 105 Di2
- Shimano 105 R7170 Di2 12-speed groupset
- Sonder Alpha I25 Gravel UK Made wheelset
Camino Al Frame And Fork
- 6061 aluminium frame
- Gravel geometry
- Carbon monocoque fork
- Huge tyre clearance
Camino TI 105
- Shimano 105 R7120 12-speed groupset
- Sonder Alpha I25 Gravel UK Made wheelset
Camino TI GRX2
- Shimano GRX 610 12-speed groupset
- Sonder Alpha I25 Gravel UK Made wheelset


